I’ve been working on 2 main projects lately, resin statuettes and a spirit board(ouija). Since our last post was a resin casting tutorial, lets talk a little more about resin and how we got to this point;
How did we get this stone-grey tone? I’ve seen many tutorials on mixing dyes with resin and even the tiniest amount of acrylic paint. Strangely, acrylic paint made my resin bubble, expand and cure to a firm sponge consistency. I have absolutely no idea how this chemistry worked, but there you have it. Dye for resin seemed a little more difficult to get my hands on and I wasn’t sure that it’s really what I needed.
My resin cures to a white tone, not clear like for jewelry. A graphite powder in small amounts would cure grey with the white resin.
For about $4 on amazon I got this –
A little bit goes a long way. A pinch will cover two of my figures and give me an extra minute or two of working time before my resin stops becoming workable. I’ll probably still go back in with some paint for aging details, but this has improved the quality and overall look of my figures.
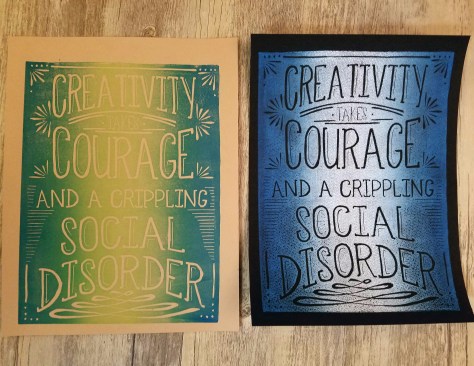
Next up is the Spirit Board! It’s 12″ x 16″ (about 30.5cm x 40.5cm) pine wood stained black. I’m trying to figure out the best application of the gold details. I’m experiencing some bleed under my custom stencil despite my adhesive. More experimenting is required, but I see the light.
I really love the gold in person, it catches the light wonderfully. My final picture will have to be under better lighting conditions. For now though I’ll have to work on the application.
Today’s update comes with a warning. This is only the second time I’ve ever done this. My credentials include watching lots of youtube videos on 2-part mold-making and an abundance of misplaced ambition. I missed taking a few starting photos, but I’ll back fill to the best of my ability.
Note; I did this as inexpensively as I could manage for learning purposes. I intend to invest more on quality products, but this is a good way to learn and make mistakes.
Materials:
-Mixable mold rubber.
I picked mine up from the local craft store.
-Air-dry sculpture clay.
There is actual mold-making clay out in the world, but this is cheap, workable and on hand. We’re just throwing it out in the end anyways.
-Mold Release Spray.
-Container to build your mold in.
Some people use legos or old tupperware. I happen to have a lot of cardboard boxes(thanks Amazon!) and a hot glue gun.
-Xacto blade.
-Your model to cast. I am using my hand-sculpted Cthulhu and Dagon statuettes.
Here we go!
1- Your Container
This is the bit I forgot to photograph, but we will make it work. I first determined the container size. I am putting 2 models in 1 mold, which is not ideal, but I refer you to the title of this post.
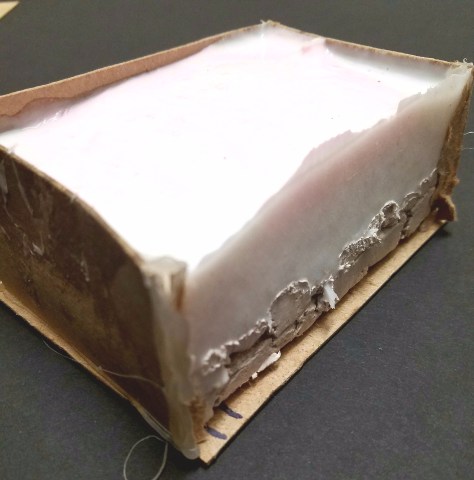
ANYWAYS! My sculpts are about 1″ x 1″ x 2″ (2.45cm x 2.45cm x 5cm), with such small figures, I think best practice is to leave at least 1 inch(2.45cm) space around your figure. However, I rarely do things in best-practice, so I actually went just under an inch. I cut out 5 pieces of cardboard and hot-glued all the seams to make a leak-proof, open-top box.
2-Plan your Layout
We’re making a 2-part mold, so there will be a seam bisecting the figures. I tried to place the seam in a location that would both be easy to cleanup with a file and wouldn’t be too noticeable.
For Cthulhu, this meant at the wing-line, leaving the bulk of the figure in 1 half of the the mold. For Dagon, this meant almost perfectly in half at the dorsal fin line, then moving diagonal along the corner to the base.
3-Spray your figure with mold-release spray!
4-Build Clay Base
I filled the bottom of my container with the clay and snugly packed my figures in clay, minding the placement of the “seam line”. We are going to pour the mold rubber on top of this to make half of the 2-part mold. I used a pen cap to make divots in the clay along the outside of the base. This will create a puzzle-like grip so the resin pours are consistent. I also placed cut straws from the base of the figure to the outside of the mold for a resin pour point. You can do this with clay or cut a hole after the fact. There will be a bit of cleanup work wherever you place your pour hole, so make it someplace not terribly noticeable.
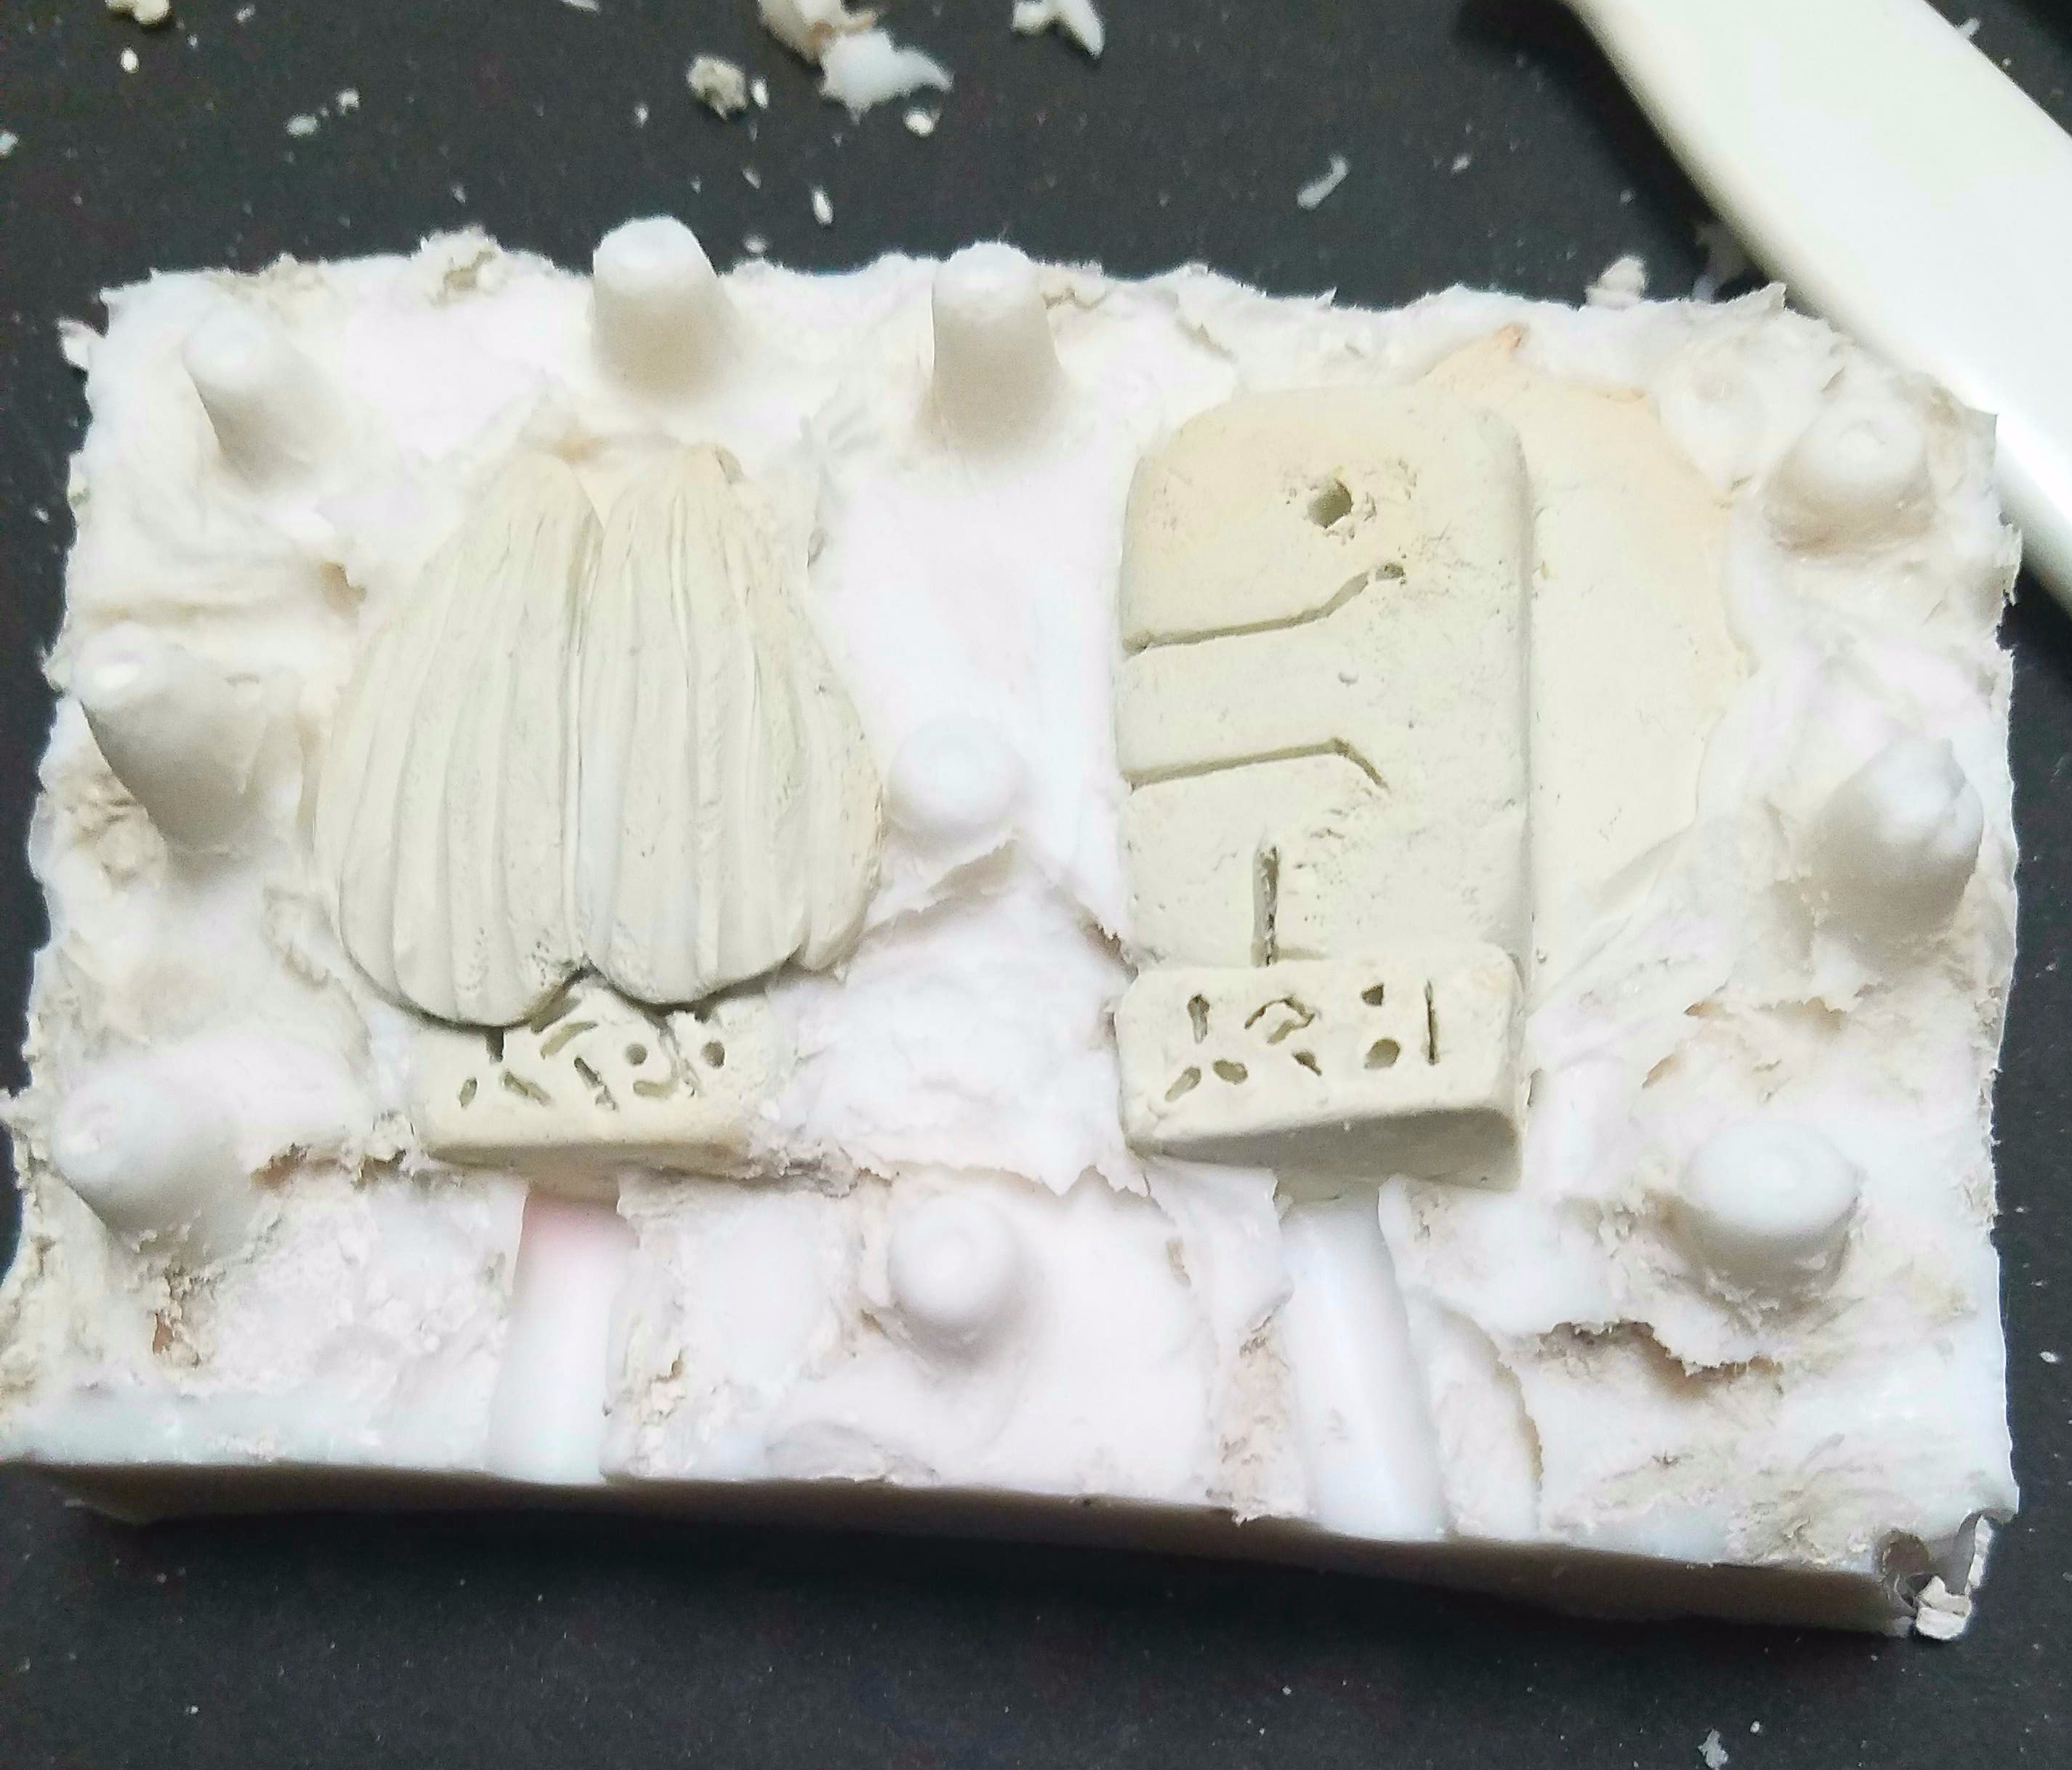
This picture is after the mold cured and the clay was removed,
but it shows the placement.
5-Mix your rubbervia box instructions and pour!
I shake my mold and tap firmly on a hard surface for several minutes to knock out any air bubbles.
Tap out those bubbles! Amazing how many surface.
I let it set for the max time recommended. I chose to let it sit over night.
6-Remove Clay
I tore open 1 side of my box and removed my mold. You can see here where my clay base is and how the rubber filled every nook and cranny and sank beyond the clay some.
and below we’re completely out of the box and flipped clay-side-up
I used an old tooth brush and water to clean the clay away I couldn’t just pull away
7-Clean up! Once the clay is swept away we can see where the mold rubber seeped between the figure and the clay. In the picture above you can see the pink rubber overtook Dagon’s fin on the right, some of Cthulhu’s wings on the left, and both pour holes.
I used my Xato blade to cleanup the seam-line and any overhang or rough patches.
8-Second Verse, Same As the First!
We’ll place our mold back in the container, or make a new one to fit if you tear yours apart. I replaced my pour-spout straws. Spray with mold-release again! Mix your mold rubber again and pour.
Remember to tap and stamp your mold to release any air bubbles. We want a nice snug mold.
9-Sweet Release
The new rubber on the second half of the mold seeped over the outside edge a tiny bit. However, because we sprayed everything with release-spray and the cured-half of the mold is much more solid than the culture clay, finding the seem is easy.
We gently pull the 2 halves apart and pull out our original figures for the first time.
Look at all that detail saved!
10-Start Casting!
I didn’t intend for this to be 10 easy steps, but here we are, all done!
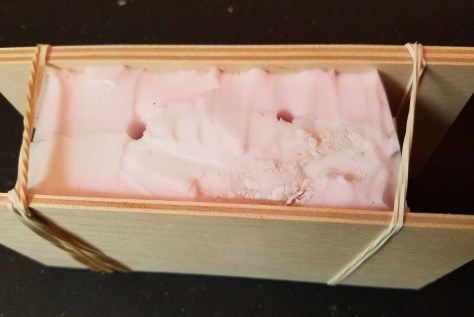
Release-spray the insides of your mold and puzzle the 2 halves back together. I used 2 pieces of compressed craft wood and some rubber bands to secure the mold tightly together. I may still open the pour spouts up a bit, or go find a tiny funnel. We’re done though, start your duplicates.
Currently, I’m using a quick-cure resin. It’s set up in 10 minutes. Which is fine for tiny projects, but doesn’t take tint well and there isn’t much working time, under a minute. So I’ll move on to better products from here, but I hardly have the working knowledge to talk about that yet.
Over the weekend a friend and much more talented artist than myself hosted a printing-party for her friends. If Jess ever decides to put her work online, this blog will immediately become a go-look-at-my-friends-awesome-projects propaganda page. Anyways, she has a printing press and a lot of patience so I could make a bunch of these;
I’ve been wanting to make a couple sets of temporary tattoos. I’m working on this set of feminist designs I’m not satisfied with them yet, but also working on a set of occult tattoos that I do feel better about but not far enough along on yet.
I’m also working on this banner.
There’s been a lot of trial and error, mostly of the latter. We’re getting there.
Happy reminder that my Etsy Shop is live with my Lovecraft prints.
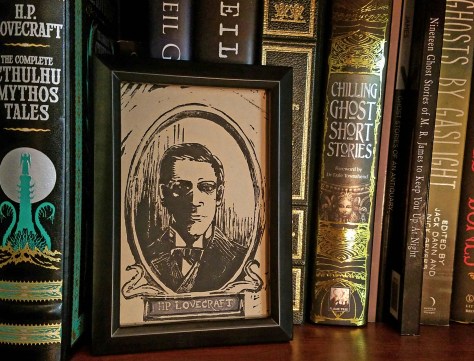
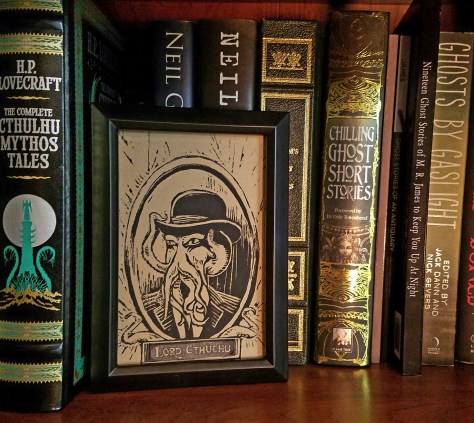
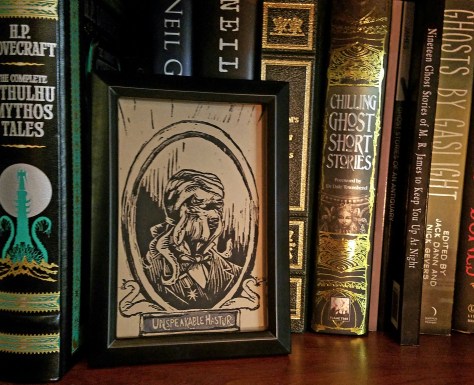
After a long slumber my Etsy Shop is live again. I’ve brought back the 4×6 in (10.1×15.2 cm) linocut block prints of H.P. Lovecraft, Cthulhu, Dagon and Hastur, as well as a reduced price for the full set of 4.
A friend that is far more capable than myself in all things has let me borrow her portable hand-press.
I’ve spent the last few days building a stock and burning through all of my 4″ x 6″ (about 10 x 15 cm) craft paper. After using it and learning how to limit my mistakes/misprints I am having a hard time seeing myself going back to trying to do this via rolling-pin.
I hope to get sets of these Lovecraftian prints up on my shop shortly.
These were a surprising hit at APExpo last year. We came home at the end of day 1 and I spent a few hours hand printing more for the next day. I came home from the show with only 3 sets left, 2 of those were reserved.
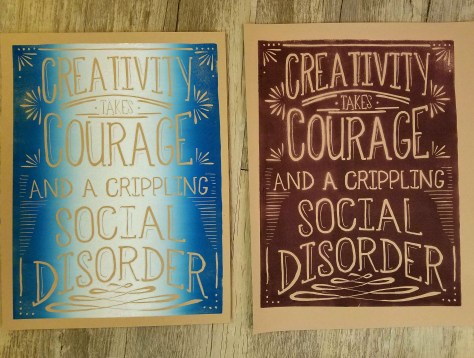
I recently made this H.P. Lovecraft quote. I’m pretty happy with it, though I don’t expect the same level of success.
Lastly, I plan to make a set of medieval-type battle banners. The finished product should be about 14″ x 8″ (about 35.5 x 20 cm) silver ink on black fabric. Below is the first test print. Some cleanup still needs to be done, but I’m into it.
If you’re a person that finds painting, RPG minis or crafting to be cathartic or zen, I suggest trying lino carving and printing. It’s a really great thing to clear an anxious mind.
Firstly, I have a (5th)Lovecraft lino cut blockprint I’m working on. My new green ink is an odd consistency and I think I need to try some new techniques and edits before it’s ready. Also, I’m working on some 1.5 inch tall (3.8 cm) prehistoric sculptures. They’re not quite right yet, but I can see the light at the end of the tunnel.
I’m also working on some mystical heraldry banner designs. They’re going to be about 7×12 inches (17.8×30.5 cm) silver or grey ink on black fabric. I’m still working over the designs, but I should be able to start carving the lino block for the goat design this weekend.
I also have some temporary tattoo designs in the works, but I’d like to save those until I have the full sets complete. I am in the process of expanding my convention line up this year.
As always Instagram usually has my current projects updates @creatrixchris
It has been some crazy times since last year. It’s list time!
1- I started a new job in late Spring. Getting on solid ground really took time out of my creating new stuff. There really is no excuse for pausing what you love, but I’m using it anyways.
2- Marc and I celebrated 5 happy years in June.
3- And went to Portland for my birthday…
4- We are apartment hunting at the moment and will soon live in cohabitation.
5- Jenna and I will be at APE again this year October 8-9 in San Jose.
We had a larger group and showing last year. The experience was enlightening for a bunch of first time con-exhibitors. Some people realized what sort of shows they should attend, some bit off more than they could chew, and some became really focused. We all had a great time last year, but this time Jenna and I realized that we had the same goals and the same aesthetic. We work great together and look forward to sharing a table in Autumn.
You can follow the twitter of Mrs. Jenna Strange if you like cool people.
Welcome new guests that my friends and I ambushed at APExpo!
It was a wondrous wormhole of talent and I really enjoyed talking to everyone that came by the ImpPressions booth, and I’m not a particularly talkative human. The art and comics community, from the readers to writers and artists, is very special. So special it feels strange being back in the world.
For those of you that are looking for my table mates Irene Lepe and her monster eyes or Jenna Adele Strange with her sailor jerry sailor scouts. I’m sure they would love to hear from the community. We are working on setting up Etsy shops and I’ll be revamping my Hag Stone comic pages in the next couple of days and posting weekly Monday updates as of next week.
This weekend is APE. I will be giving away the first 4 pages of my new web comic Hag Stone for FREE. The black and white versions are online for your viewing pleasure. And once I recover from the inevitable nervous breakdown I will have this weekend, polished color versions will replace these rushed pages and we can look forward to weekly updates.
Lets see what kind of trouble a witch, an ambitious elf entrepreneur and a thieving dwarf can get themselves into.


 This picture is after the mold cured and the clay was removed,