
Today’s update comes with a warning. This is only the second time I’ve ever done this. My credentials include watching lots of youtube videos on 2-part mold-making and an abundance of misplaced ambition. I missed taking a few starting photos, but I’ll back fill to the best of my ability.
Note; I did this as inexpensively as I could manage for learning purposes. I intend to invest more on quality products, but this is a good way to learn and make mistakes.
Materials:
-Mixable mold rubber.
I picked mine up from the local craft store. 
-Air-dry sculpture clay.
There is actual mold-making clay out in the world, but this is cheap, workable and on hand. We’re just throwing it out in the end anyways.

-Mold Release Spray.
-Container to build your mold in.
Some people use legos or old tupperware. I happen to have a lot of cardboard boxes(thanks Amazon!) and a hot glue gun.
-Xacto blade.
-Your model to cast. I am using my hand-sculpted Cthulhu and Dagon statuettes.
Here we go!
1- Your Container
This is the bit I forgot to photograph, but we will make it work. I first determined the container size. I am putting 2 models in 1 mold, which is not ideal, but I refer you to the title of this post.
ANYWAYS! My sculpts are about 1″ x 1″ x 2″ (2.45cm x 2.45cm x 5cm), with such small figures, I think best practice is to leave at least 1 inch(2.45cm) space around your figure. However, I rarely do things in best-practice, so I actually went just under an inch. I cut out 5 pieces of cardboard and hot-glued all the seams to make a leak-proof, open-top box.
2-Plan your Layout
We’re making a 2-part mold, so there will be a seam bisecting the figures. I tried to place the seam in a location that would both be easy to cleanup with a file and wouldn’t be too noticeable.
For Cthulhu, this meant at the wing-line, leaving the bulk of the figure in 1 half of the the mold. For Dagon, this meant almost perfectly in half at the dorsal fin line, then moving diagonal along the corner to the base.
3-Spray your figure with mold-release spray!
4-Build Clay Base
I filled the bottom of my container with the clay and snugly packed my figures in clay, minding the placement of the “seam line”. We are going to pour the mold rubber on top of this to make half of the 2-part mold. I used a pen cap to make divots in the clay along the outside of the base. This will create a puzzle-like grip so the resin pours are consistent. I also placed cut straws from the base of the figure to the outside of the mold for a resin pour point. You can do this with clay or cut a hole after the fact. There will be a bit of cleanup work wherever you place your pour hole, so make it someplace not terribly noticeable.
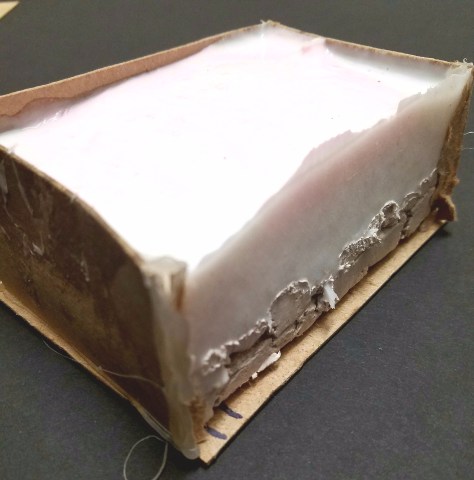
 This picture is after the mold cured and the clay was removed,
but it shows the placement.
5-Mix your rubber via box instructions and pour! 
I shake my mold and tap firmly on a hard surface for several minutes to knock out any air bubbles.

I let it set for the max time recommended. I chose to let it sit over night.
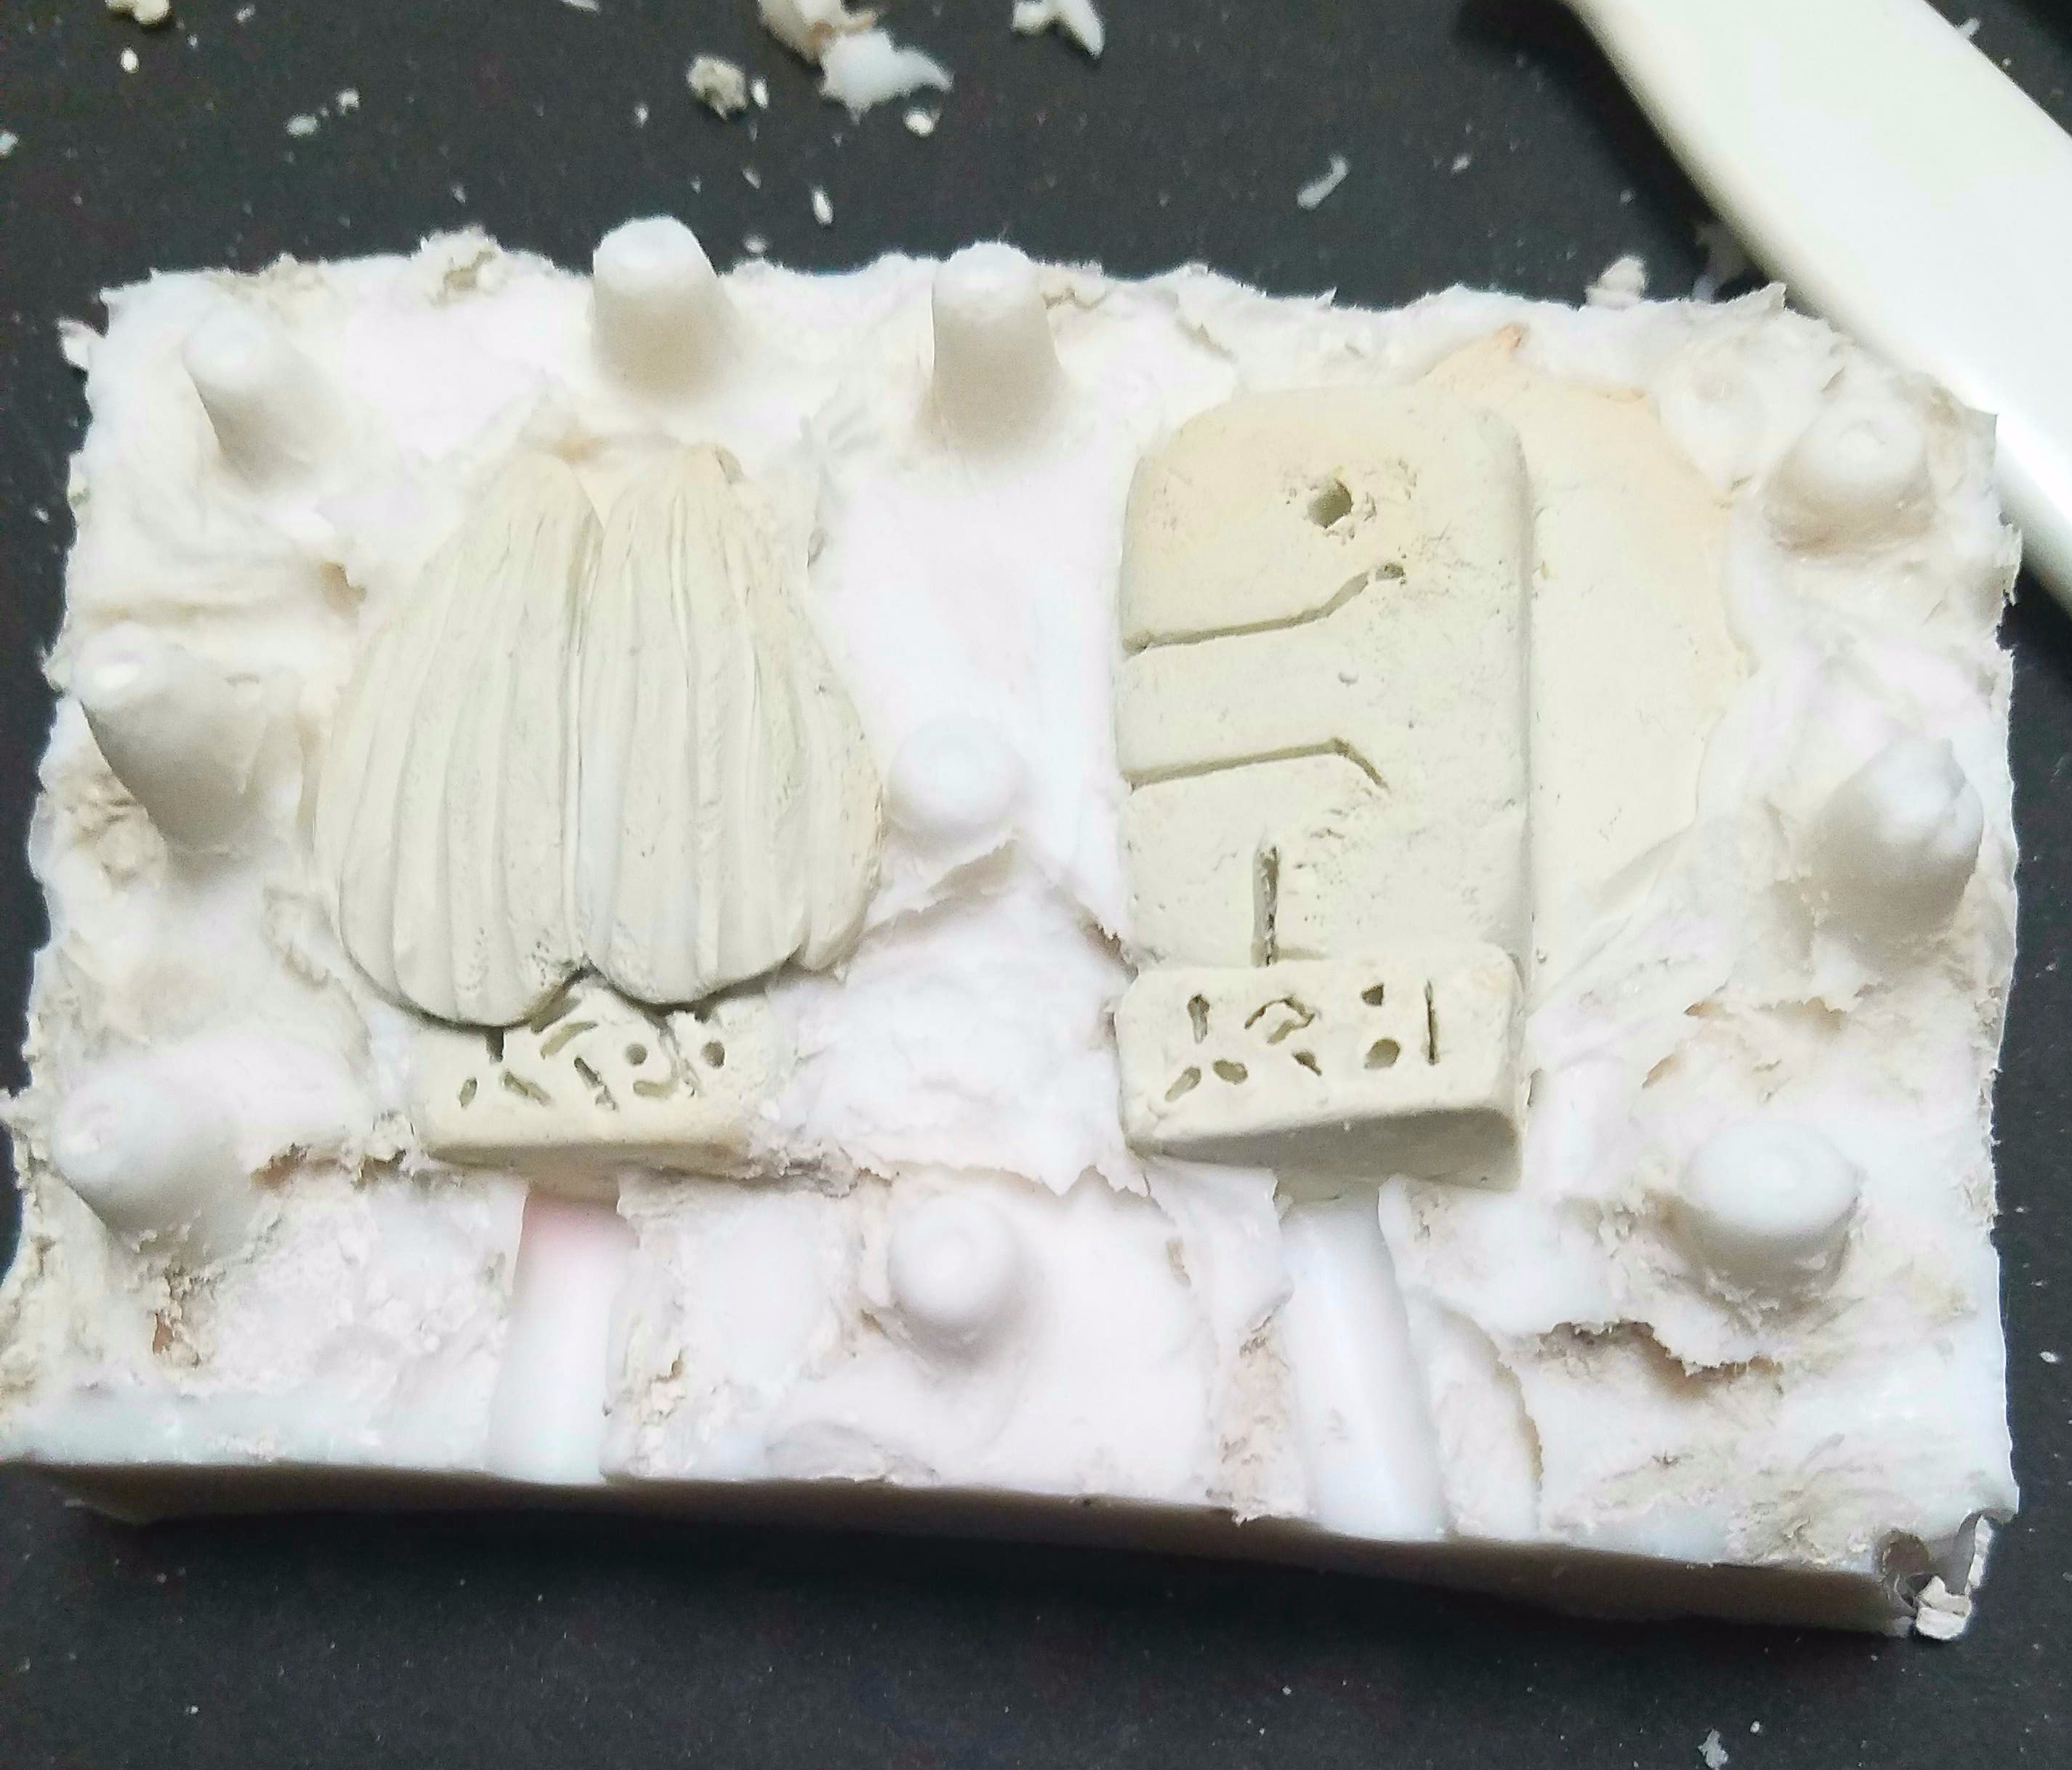
6-Remove Clay
I tore open 1 side of my box and removed my mold. You can see here where my clay base is and how the rubber filled every nook and cranny and sank beyond the clay some.
and below we’re completely out of the box and flipped clay-side-up

I used an old tooth brush and water to clean the clay away I couldn’t just pull away

7-Clean up!
Once the clay is swept away we can see where the mold rubber seeped between the figure and the clay. In the picture above you can see the pink rubber overtook Dagon’s fin on the right, some of Cthulhu’s wings on the left, and both pour holes.
I used my Xato blade to cleanup the seam-line and any overhang or rough patches.
8-Second Verse, Same As the First!
We’ll place our mold back in the container, or make a new one to fit if you tear yours apart. I replaced my pour-spout straws. Spray with mold-release again! Mix your mold rubber again and pour.
Remember to tap and stamp your mold to release any air bubbles. We want a nice snug mold.
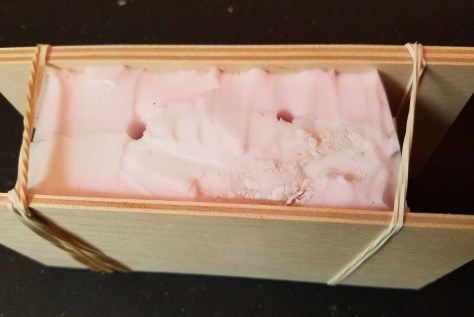
9-Sweet Release
The new rubber on the second half of the mold seeped over the outside edge a tiny bit. However, because we sprayed everything with release-spray and the cured-half of the mold is much more solid than the culture clay, finding the seem is easy.
We gently pull the 2 halves apart and pull out our original figures for the first time.


Look at all that detail saved!
10-Start Casting!
I didn’t intend for this to be 10 easy steps, but here we are, all done!
Release-spray the insides of your mold and puzzle the 2 halves back together. I used 2 pieces of compressed craft wood and some rubber bands to secure the mold tightly together. I may still open the pour spouts up a bit, or go find a tiny funnel. We’re done though, start your duplicates.

Currently, I’m using a quick-cure resin. It’s set up in 10 minutes. Which is fine for tiny projects, but doesn’t take tint well and there isn’t much working time, under a minute. So I’ll move on to better products from here, but I hardly have the working knowledge to talk about that yet.
Stay Curious,
Christine A. Williamson
Etsy Shop is live with my Lovecraft prints
